16-Cli篇
定制脚手架
一般公司往往都会根据公司主要技术栈,预先搭建好自己的一套项目模板,存放在公司的代码仓库中
例如 template-web、template-h5、tempalte-uniapp 等,在开发新项目的时候,只需要下载项目模板即可快速进行开发
但每次都得打开公司的代码仓库,找到对应模板进行下载,是麻烦了些~
这时就可以开发一套命令行指令,像 create-vite-app 一样能够自己找到对应模板后,
自动下载模板下来,提高项目开发前的一点点体验
功能简介
我们即将开发的 cli 脚手架应该具备的能力
- 解析命令行能力,能拿到命令行输入的项目名
- 提供命令行交互能力,选择模板
- 根据选择模板的
git地址下载指定的项目模板 - 判断路径是否存在同名文件,提供是否覆盖功能
常用 node 包
以下是开发 cli 过程中可能会使用到的包,只简述大概功能,更多细节功能
用到的时候再去查对应文档即可
colorette- 命令行输出着色esbuild-cli打包git-clone- 用于下载仓库和执行git命令,支持promisefs-extra-nodejs中的fs替代,用于操作文件prompts- 解析命令行中-n、-t... 等参数@inquirer/prompts- 命令行交互,提供input、select... 等操作pathe- 处理路径,与path类似@changesets/cli- 打tag,并上传cli包到npm
如何开发
项目架构解析
项目结构设计,我们按模块划分,一个模块只执行一个功能
比如,我们需要一个解析当前命令函数参数的功能,这就是一个模块,我们把这些功能都放在 utils 中
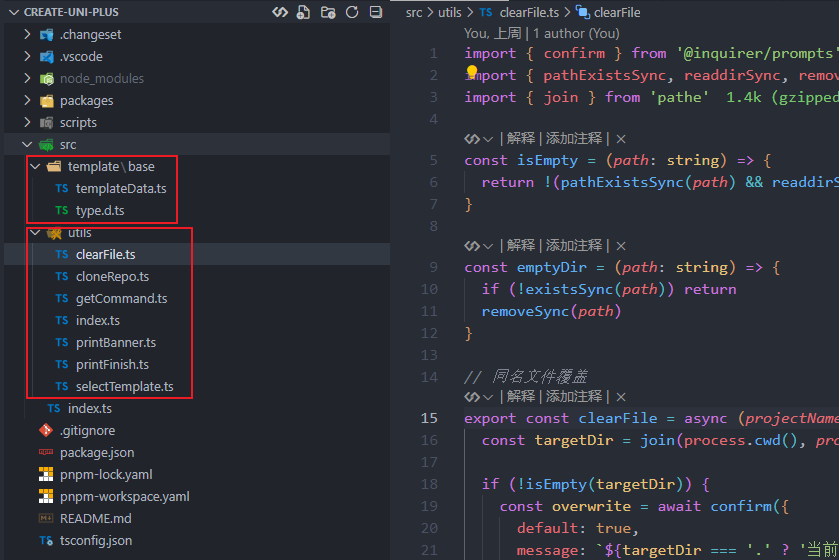
我们将要在 utils 中实现 6 个功能
clearFile覆盖同名文件getCommand获取命令行参数cloneRepo下载模板selectTemplate选择模板printBanner打印下载完成banner
所有功能将由 src/utils/index 统一导出
template 主要是编写模板信息,也是下载模板的路径等信息
 ·
·
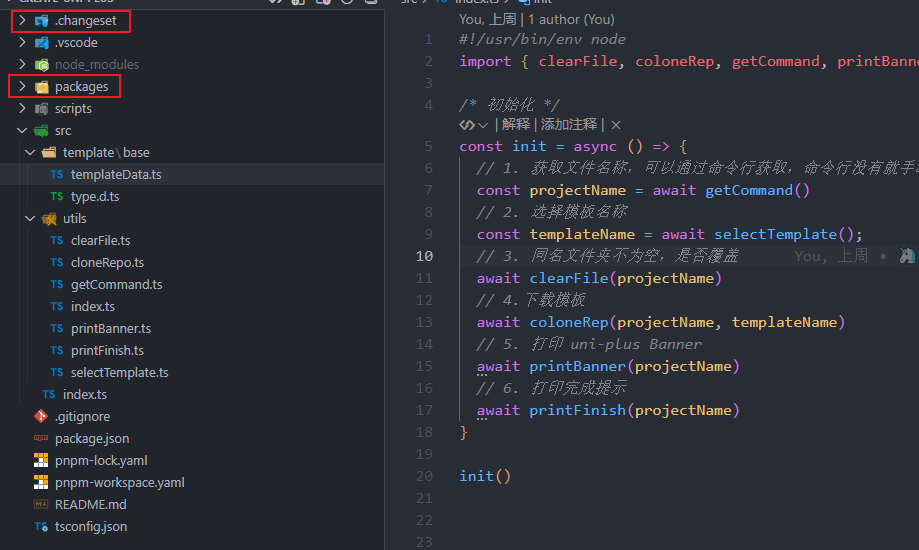
changeset 用于发布 cli 版本,我们打包后的文件就放在 packages 下
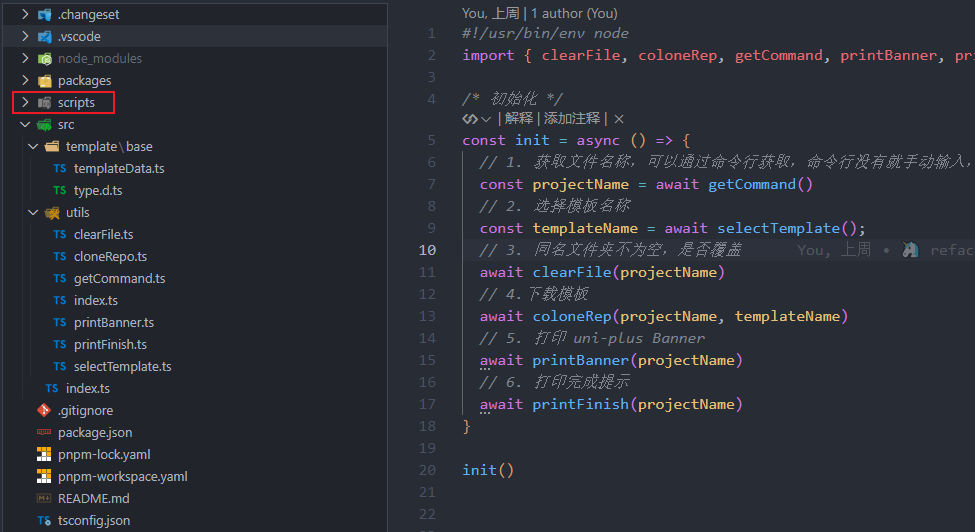
我们的 cli 使用 esbuild 进行打包 ,打包配置就放在这里 srcipts 下
介绍完基本的项目架构后,我们正式进入开发阶段~
基础架构搭建
先初始化项目
mkdir uni-plus-cli-test
cd uni-plus-cli-test
npm init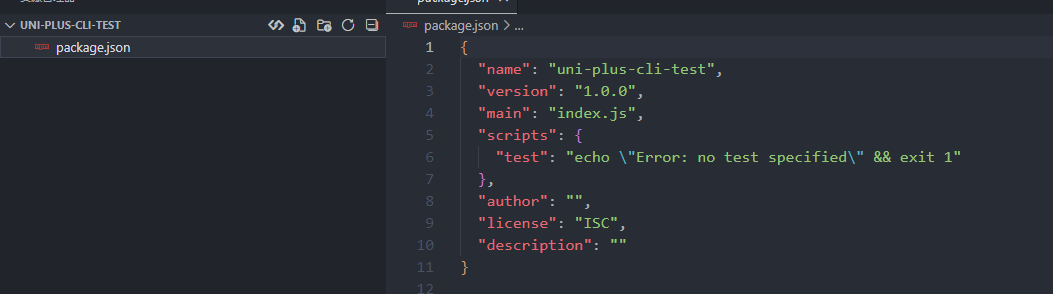
接下来我们安装下所需脚手架所需要的依赖
先不一次性安装完成,只安装总的依赖
我们用到了哪个依赖就再安装,方便我们加深印象
pnpm install typescript @types/node这个两个依赖主要用于,让脚手架支持 typescript 语法
因为,我们编写的都是 typescripte 文件,我们需要先编译成 javascripte 文件才能运行
我才用 esbuild 进行打包
pnpm add esbuild安装完成之后,我们需要编写下打包配置 scripts/build.js
import { build } from "esbuild";

await build({
  bundle: true,
  entryPoints: ["./src/index.ts"],
  outfile: "./packages/cli/index.cjs",
  format: "cjs",
  platform: "node",
  target: "node18",
  minify: true,
});
package.json 也需要配置下打包命令
"scripts": {
    "build": "node ./scripts/build.js",
    "dev": "node ./packages/cli/index.cjs"
},
"type": "module",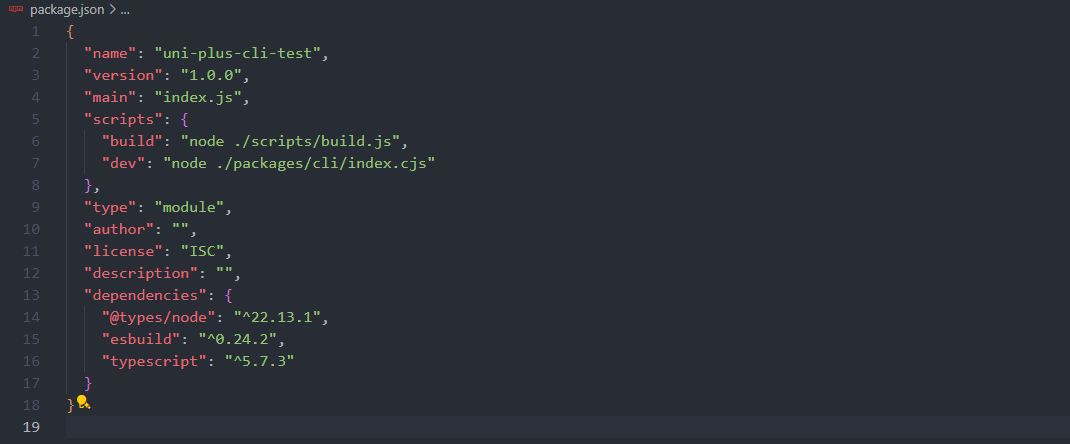
创建完成之后,我们开始先编写 src/index.ts,测试下打包是否成功
/* 初始化 */
const init = async () => {
  console.log('uni-plus-cli-test');
}

init()pnpm build
pnpm dev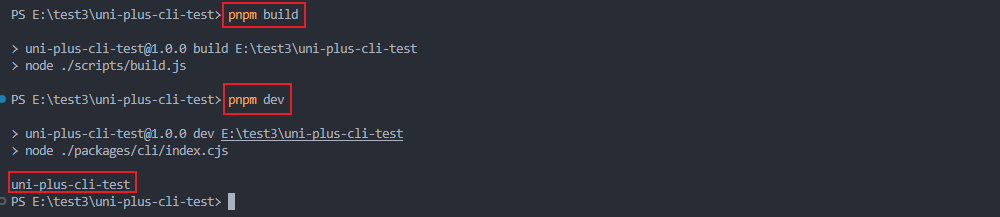
自此我们的基础架构搭建就已经完成,接下来的就是功能的开发阶段~
1. 获取命令行信息
获取命令行信息这一小节,我们要实现获取项目名功能,获取项目名可以通过四种方式获取
- 直接获取在命令行末尾的项目名
- 通过
-n或者--name获取项目名 - 通过命令行输入的方式,获取项目名
- 不输入,则使用默认项目名
要实现这些功能我们需要用到两个插件
commander获取命令参数@inquirer/prompts提供输入、选择、确认等命令行快捷操作
pnpm add commander @inquirer/prompts编写下功能模块 getCommand
// src/utils/getCommand.ts

import { Command } from 'commander';
import { input } from '@inquirer/prompts';

export const getCommand = async () => {
  const program = new Command();
  // 获取命令行的参数, 根据参数执行不同的逻辑

  const opts = program
    .name('uni-plus')
    .description('创建项目')
    .argument('[project-name]', '项目名称')
    .helpOption('-h, --help', '查看帮助')
    .option('-n, --name <name>', '项目名称')
    .opts()

  program.parse()

  let projectName = program.args[0] ? program.args[0] : opts.name || ''

  // 如果命令行没有项目名,就输入项目名称
  while (!projectName) {
    projectName = await input({ message: '请输入项目名', default: 'uni-plus' });
  }

  return projectName

}
program.opts() 返回解析后的参数对象 opts.name 才能直接拿到 -n 后的项目名
program.args 可以拿到 argument 的项目名称
argument 或者 -n 都拿不到 项目名 就采用 @inquirer/prompts 的 input 输入方式获取项目名
如果你想增加功能,可以到 Commander、@inquirer/prompts中查看其更多用法,难度不大,而且有很多案例的
然后将 getCommand 导出,然后在 src/utils/index.ts 中统一导出
// src/utils/index.ts
export * from './getCommand'
src/index.ts 引用下 getCommand 模块获取项目名,可以直接从 utils 统一导入
// src/index.ts
import { getCommand } from './utils';

/* 初始化 */
const init = async () => {
  // // 1. 获取文件名称,可以通过命令行获取,命令行没有就手动输入,不输入就使用默认名称
  const projectName = await getCommand()
  console.log('🚀 ~ init ~ projectName:', projectName)
}

init()
看来测试下效果,我们通过命令行末尾添加项目名
pnpm build 通过
通过 -n 或者 --name 获取项目名
 通过命令行输入的方式,获取项目名
 不输入,则使用默认项目名
2. 选择模板名
我们先定义模板相关信息
// src/template/base/type.d.ts

type AtLeastOne<T, U = { [K in keyof T]: Pick<T, K> }> = Partial<T> & U[keyof U]

interface GithubGitee {
  github: string
  gitee: string
}

interface BaseTemplateList {
  title: string // 模板名称
  branch: string // 模板分支
  url: GithubGitee // 模板地址
}

export type TemplateList = BaseTemplateList// src/template/base/templateData.ts
import { green } from 'kolorist'
import type { TemplateList } from './type'
export const templateList: TemplateList[] = [
{
title: `uni-plus-base${green('(base 项目)')}`,
branch: 'base',
url: {
gitee: 'https://gitee.com/FOM/uni-plus.git',
github: 'https://github.com/Jackie-Lin/uni-plus',
},
},
{
title: `uni-plus-demo${green('(demo 项目)')}`,
branch: 'demo',
url: {
gitee: 'https://gitee.com/FOM/uni-plus.git',
github: 'https://github.com/Jackie-Lin/uni-plus',
}, // 模板地址
}
]我们的模板都是根据不同分支来区分的
一个分支对应一种模板
接下来编写下,选择模板模块 selectTemplate
// src/utils/selectTemplate.ts

import { select } from '@inquirer/prompts';
import { templateList } from '../template/base/templateData'

/* 选择模板,获取模板名称 */
export const selectTemplate = async () => {
  const templateName = await select({
    message: '请选择项目模版',
    choices: templateList.map((item) => {
      return {
        name: item.title,
        value: item.title,
      }
    }),
  });

  return templateName
}// src/utils/index.ts
export * from './selectTemplate'
export * from './getCommand'// src/index.ts
import { getCommand, selectTemplate } from './utils';
/* 初始化 */
const init = async () => {
// 1. 获取文件名称,可以通过命令行获取,命令行没有就手动输入,不输入就使用默认名称
const projectName = await getCommand()
console.log('🚀 ~ init ~ projectName:', projectName)
// 2. 选择模板名称
const templateName = await selectTemplate();
console.log('🚀 ~ init ~ templateName:', templateName)
}
init()测试一下
pnpm build
3. 覆盖同名文件
如果我们本地已经有一个同名的文件夹了
提示 “...是否删除现有文件并继续?”
确认就覆盖,取消就退出
功能明确,我们开干~
由于我们需要操作文件,也需要对文件路径进行操作
那么就要安装这三个插件
fs-extra对文件进行操作@types/fs-extrafs-extra插件的类型文件pathe对路径进行操作
pnpm add pathe fs-extra @types/fs-extra// src/utils/clearFile.ts
import { confirm } from '@inquirer/prompts';
import { pathExistsSync, readdirSync, removeSync, existsSync } from 'fs-extra'
import { join } from 'pathe'
const isEmpty = (path: string) => {
return !(pathExistsSync(path) && readdirSync(path).length !== 0)
}
const emptyDir = (path: string) => {
if (!existsSync(path)) return
removeSync(path)
}
// 同名文件覆盖
export const clearFile = async (projectName: string) => {
const targetDir = join(process.cwd(), projectName)
if (!isEmpty(targetDir)) {
const overwrite = await confirm({
default: true,
message: `${targetDir === '.' ? '当前目录' : `目标目录 "${targetDir}"`} 不为空,是否删除现有文件并继续?`,
})
if (!overwrite) {
process.exit(1)
} else {
emptyDir(targetDir)
}
}
}该模块主要包含三个函数
isEmpty路径判空emptyDir文件判断空clearFile清除文件
先获取文件当前目录与目标目录
然后判断目录是否为空,再根据 confirm 命令行快捷操作,选择是否删除同名文件
否就退出,是就删除文件
existsSync 与 pathExistsSync 区别在于,existsSync 可以判断文件是否存在,pathExistsSync 只能判断路径是否存在
join 拼接路径, process.cwd() 获取当前工作目录路径
导出并使用
// src/utils/index.ts

export * from './clearFile'
export * from './selectTemplate'
export * from './getCommand'// src/index.ts
import { clearFile, getCommand, selectTemplate } from './utils';
/* 初始化 */
const init = async () => {
// 1. 获取文件名称,可以通过命令行获取,命令行没有就手动输入,不输入就使用默认名称
const projectName = await getCommand()
console.log('🚀 ~ init ~ projectName:', projectName)
// 2. 选择模板名称
const templateName = await selectTemplate();
console.log('🚀 ~ init ~ templateName:', templateName)
// 3. 同名文件夹不为空,是否覆盖
await clearFile(projectName)
}
init()为了测试效果,我们先在根目录建立一个 test-project 文件夹,并写入 index.ts 文件

pnpm build
可以看到,有同名文件夹的时候,就会提示是否删除,选择是就会被删除
选择否,会退出命令行,功能完美实现~
4. 下载模板
通过远程下载模板需要通过插件来实现,当然可以使用手写,如果有同学感兴趣的话,可以留言~
我会根据情况,补上手写,现在我们使用插件的方式来写一下
需要用到三个插件
cli-spinner通常用于命令行加载动画git-clone克隆仓库colorette设置打印样式
pnpm add colorette git-clone cli-spinner// src/utils/cloneRepo.ts
import { Spinner } from 'cli-spinner'
import gitClone from 'git-clone/promise'
import { greenBright } from 'colorette'
import { templateList } from '../template/base/templateData'
import { readJson, remove, writeJSON } from 'fs-extra'
import { join } from 'pathe'
import type { TemplateList } from '../template/base/type'
// 下载模板
export const coloneRep = async (projectName: string, templateName: string) => {
const targetDir = join(process.cwd(), projectName)
const templateData = templateList.find(v => v.title === templateName) as TemplateList
const repoUrl = templateData.url.gitee
const branchName = templateData.branch
const spinner = new Spinner('正在下载中... %s')
spinner.setSpinnerString('|/-\\')
spinner.start()
await gitClone(repoUrl, projectName, { checkout: branchName })
await remove(join(targetDir, '.git'))
const packageJson = await readJson(join(targetDir, 'package.json'))
packageJson.name = projectName
await writeJSON(join(targetDir, 'package.json'), packageJson, { spaces: 2 })
spinner.stop(true)
console.log();
console.log(greenBright('模板下载完成'))
}根据 项目名与模板名称,拿到 仓库下载地址、与所属分支
使用 Spinner 设置加载动画,new Spinner('正在下载中... %s') 中 %s 是动画的占位符
spinner.setSpinnerString 会从第一字符到最后一个字符循环切换,并填入 %s,从而实现动画效果
gitClone(远程仓库地址, 项目名称, 分支名称) 是用于下载远程仓库,默认是下载到当前目录下
readJson 读取本地 package.json 信息,并重置 package.json 中的项目名
最后使用 writeJSON 写入本地 package.json ,spaces: 2 选项来指定文件内容应该使用两个空格进行缩进
spinner.stop 是停止下载动画
greenBright 是设置打印颜色为亮绿色
接下来还是一样的,导出使用
// src/utils/index.ts

export * from './cloneRepo'
export * from './clearFile'
export * from './selectTemplate'
export * from './getCommand'// src/index.ts
import { clearFile, coloneRep, getCommand, selectTemplate } from './utils';
/* 初始化 */
const init = async () => {
// 1. 获取文件名称,可以通过命令行获取,命令行没有就手动输入,不输入就使用默认名称
const projectName = await getCommand()
console.log('🚀 ~ init ~ projectName:', projectName)
// 2. 选择模板名称
const templateName = await selectTemplate();
console.log('🚀 ~ init ~ templateName:', templateName)
// 3. 同名文件夹不为空,是否覆盖
await clearFile(projectName)
// // 4.下载模板
await coloneRep(projectName, templateName)
}
init()直接看下效果
【注意】如果下载的过程中出现报错,可以尝试使用下面的命令
git init5. 打印 Banner
接下来就简单很多了~
我们需要实现的效果就是,下载完模板之后,显示我们的作者信息,文档地址、gitee 地址等等
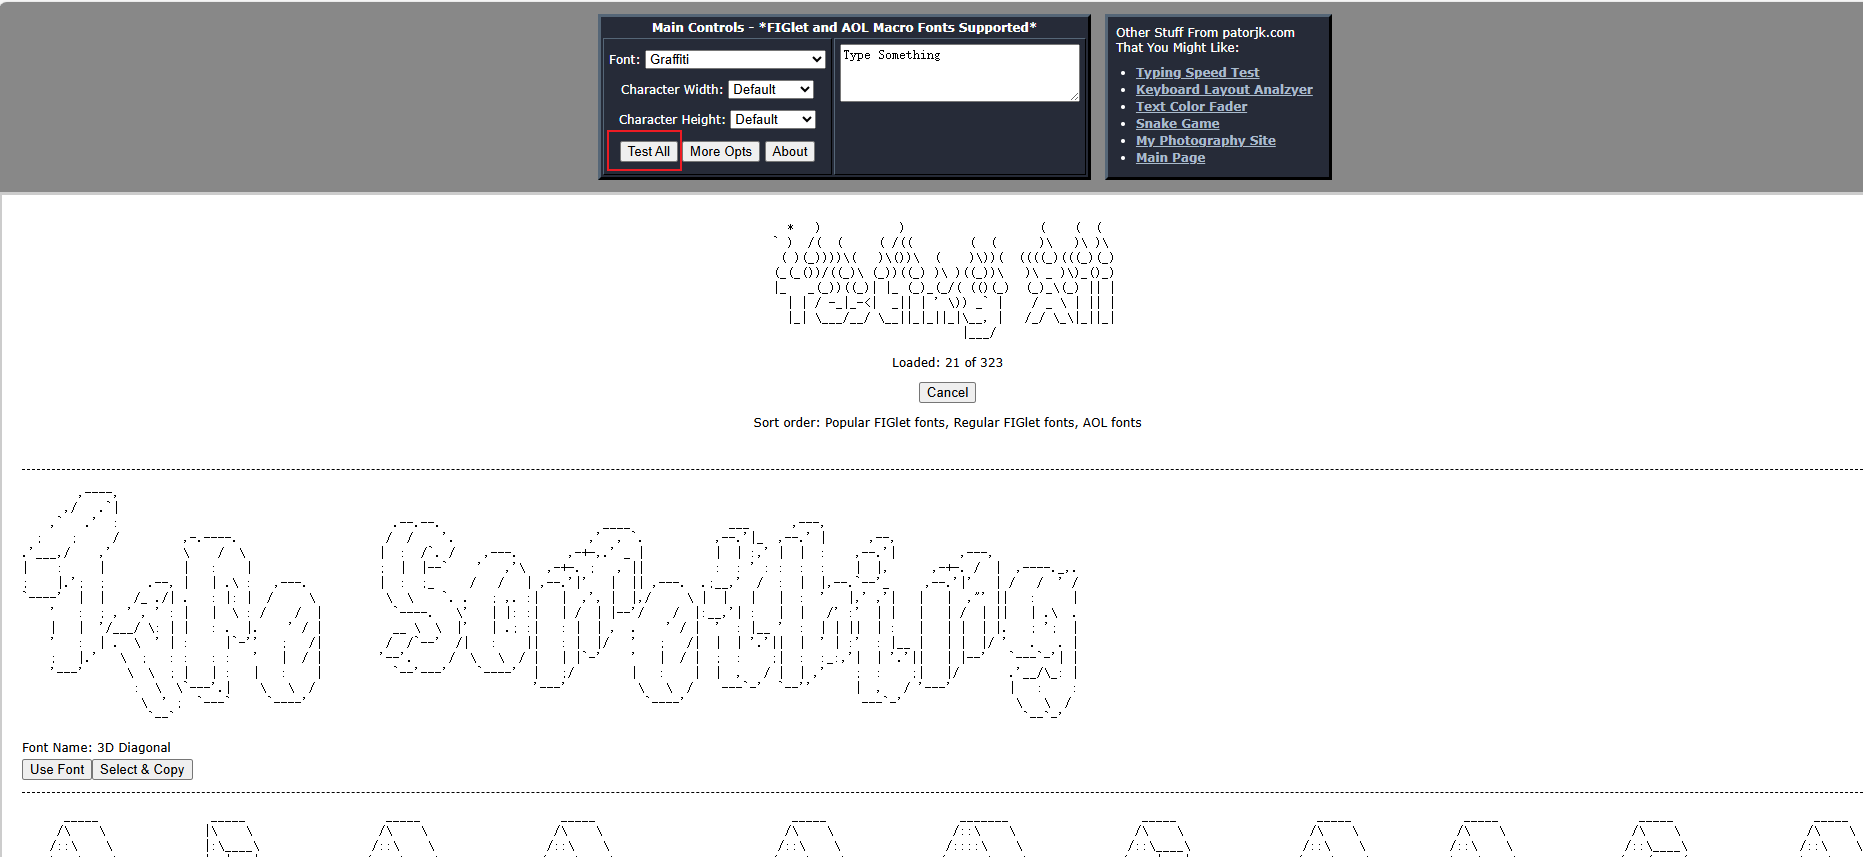
首先我们先实现,最上面的 FIGlet 字体
相信很多同学都见过字体,那他是怎么来的呢?我们可以使用这个网站来生成
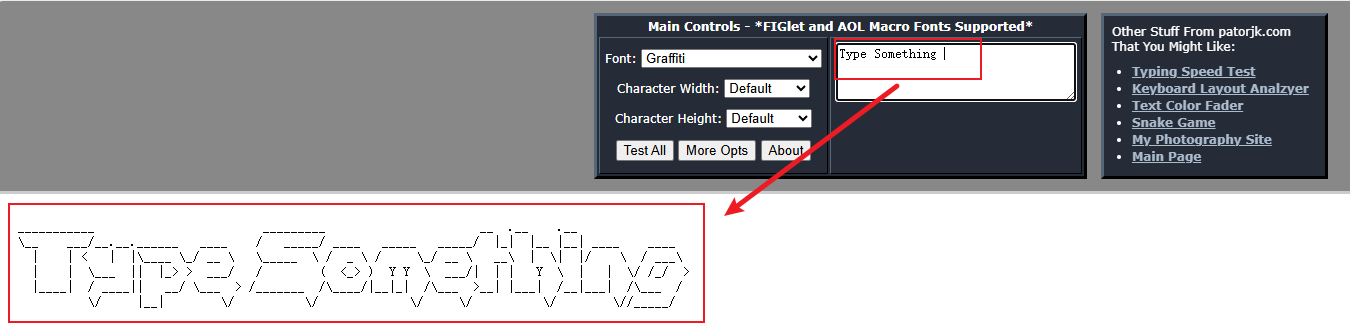
只要在输入框中输入你想要的生成的文字,就可以在左下角生成
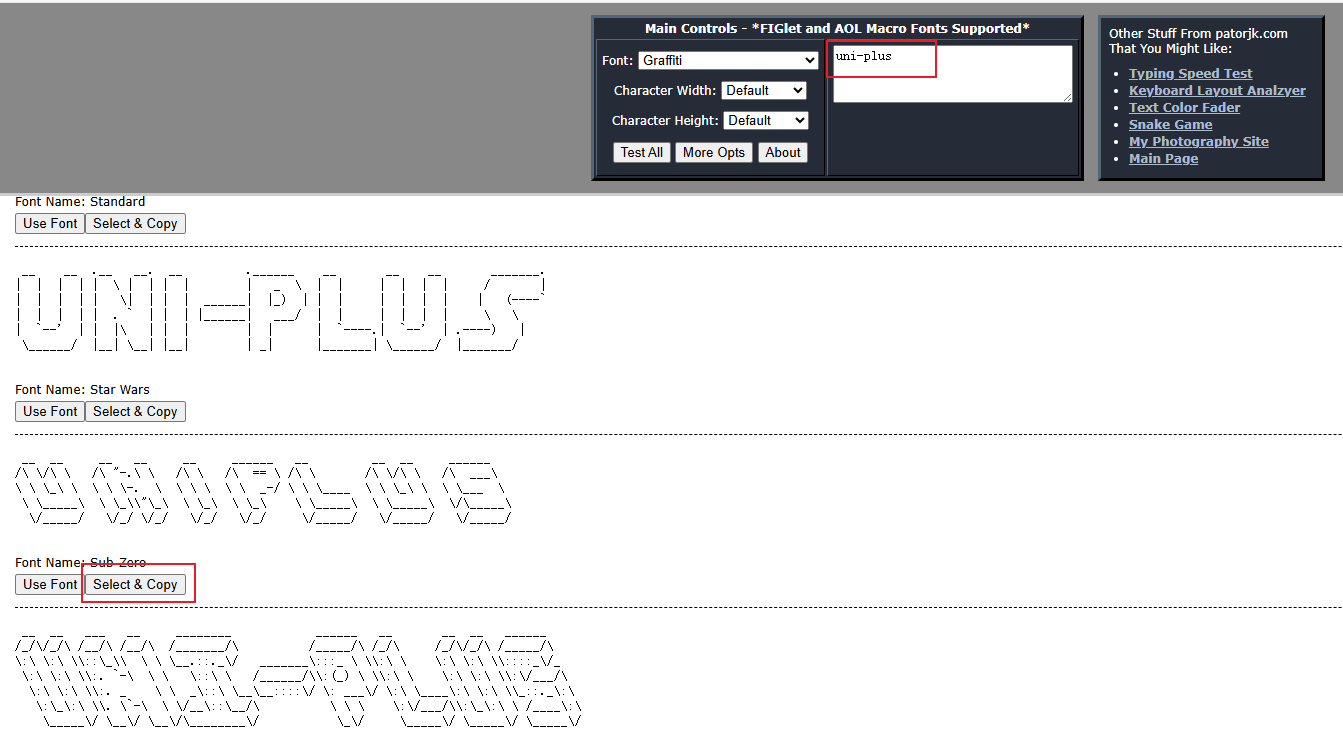
如果你想更多类型的字体,可以点击 Test All
然后选择你喜欢的字体类型,输入 uni-plus, 选择 Sub-Zero 字体
// src/utils/printBanner.ts

/* 打印 banner */
export const printBanner = (projectName: string) => {
  console.log('🚀 ~ printBanner ~ projectName:', projectName)
  console.log(`

 __  __     __   __     __     ______   __         __  __     ______
/\ \/\ \   /\ "-.\ \   /\ \   /\  == \ /\ \       /\ \/\ \   /\  ___\
\ \ \_\ \  \ \ \-.  \  \ \ \  \ \  _-/ \ \ \____  \ \ \_\ \  \ \___  \
 \ \_____\  \ \_\\"\_\  \ \_\  \ \_\    \ \_____\  \ \_____\  \/\_____\
  \/_____/   \/_/ \/_/   \/_/   \/_/     \/_____/   \/_____/   \/_____/


  `);
}// src/utils/index.ts
export * from './cloneRepo'
export * from './clearFile'
export * from './selectTemplate'
export * from './getCommand'
export * from './printBanner'// src/index.ts
import { clearFile, coloneRep, getCommand, printBanner, selectTemplate } from './utils';
/* 初始化 */
const init = async () => {
// 1. 获取文件名称,可以通过命令行获取,命令行没有就手动输入,不输入就使用默认名称
const projectName = await getCommand()
// 2. 选择模板名称
const templateName = await selectTemplate();
// 3. 同名文件夹不为空,是否覆盖
await clearFile(projectName)
// 4.下载模板
await coloneRep(projectName, templateName)
// 5. 打印 uni-plus Banner
await printBanner(projectName)
}
init()执行一下,看看
pnpm build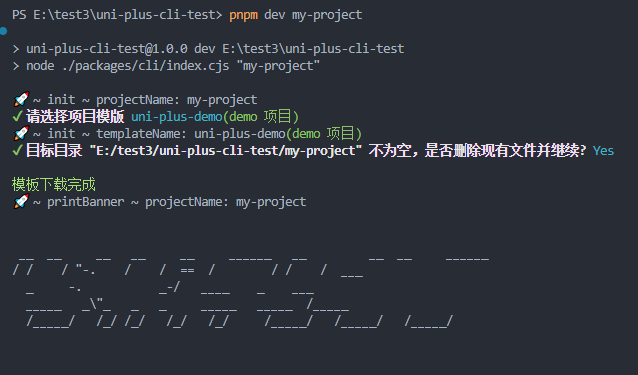
这打印的是个啥呀,和我们想的输出结果不一样啊~
为什么呢?
细看这个打印信息,可以发现,基本上都是 / 斜杠,几乎没有 \ 反斜杠
原来我们的字体组成,是有很多 \ 反斜杠的
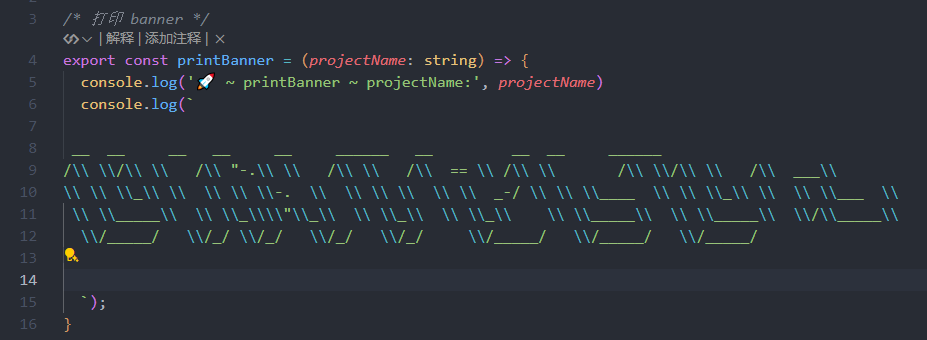
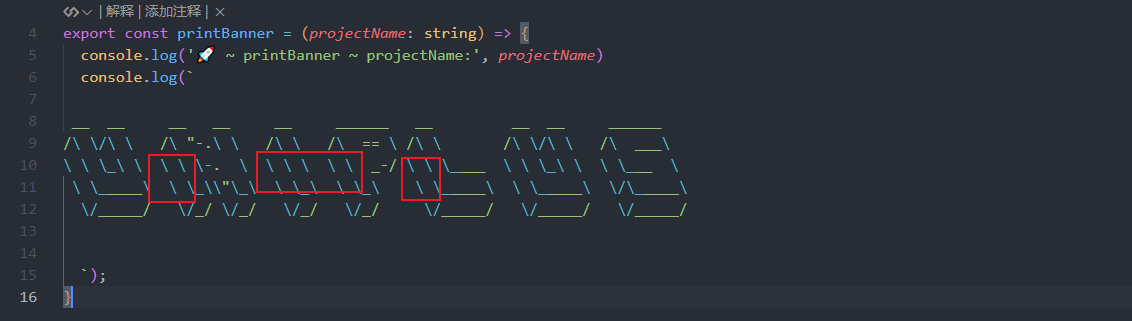 这些蓝色的都是反斜杠,这些都没有被打印出来~
是因为 console.log 这个打印函数无法直接打印反斜杠,需要转义才能打印出来
那要怎么解决呢?
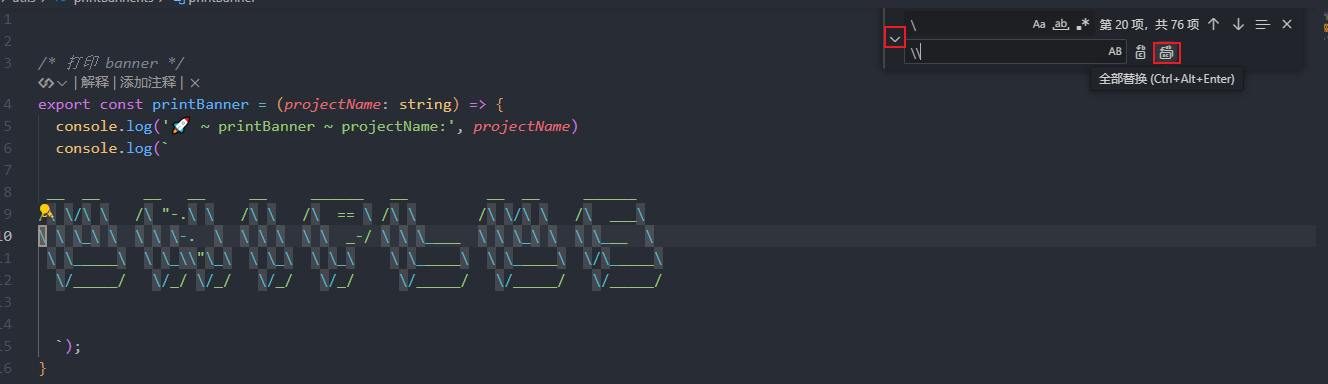
可以这样,在 vscode 中按 ctrl + F,调出页面查找、替换快捷工具
然后,我们把 "单反斜杠" 替换为 "双反斜杠"
从新跑一下,得到了预期的效果
pnpm build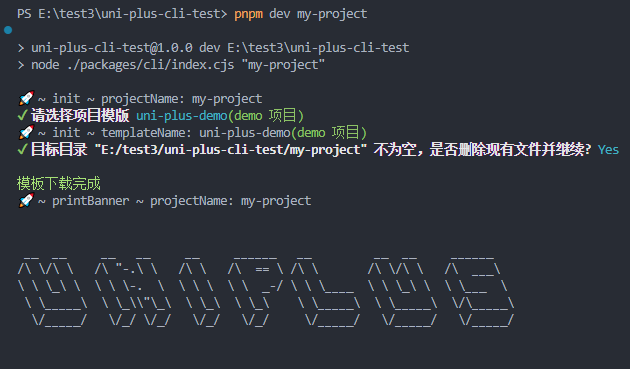
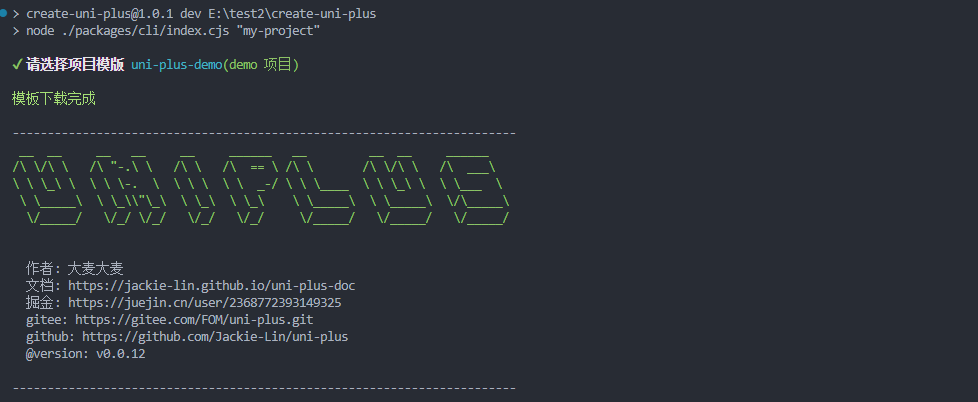
再完善一下 src/utils/printBanner.ts
import { lightCyan, green } from 'kolorist'
import process from 'node:process'
import fse from 'fs-extra'
import path from 'node:path'

/* 打印 banner */
export const printBanner = (projectName: string) => {
  const pkgJson = fse.readJSONSync(path.join(process.cwd(), `${projectName}/package.json`));
  const version = pkgJson.version;

  const figLet = ` __  __     __   __     __     ______   __         __  __     ______
/\\ \\/\\ \\   /\\ "-.\\ \\   /\\ \\   /\\  == \\ /\\ \\       /\\ \\/\\ \\   /\\  ___\\
\\ \\ \\_\\ \\  \\ \\ \\-.  \\  \\ \\ \\  \\ \\  _-/ \\ \\ \\____  \\ \\ \\_\\ \\  \\ \\___  \\
 \\ \\_____\\  \\ \\_\\\\"\\_\\  \\ \\_\\  \\ \\_\\    \\ \\_____\\  \\ \\_____\\  \\/\\_____\\
  \\/_____/   \\/_/ \\/_/   \\/_/   \\/_/     \\/_____/   \\/_____/   \\/_____/
`
  const info = `
  作者: 大麦大麦
  文档: https://jackie-lin.github.io/uni-plus-doc
  掘金: https://juejin.cn/user/2368772393149325
  gitee: https://gitee.com/FOM/uni-plus.git
  github: https://github.com/Jackie-Lin/uni-plus
  @version: v${version}
  `

  console.log()
  console.log('------------------------------------------------------------------------');
  console.log(lightCyan(green(figLet)));
  console.log(info);
  console.log('------------------------------------------------------------------------\n');
}
readJSONSync 获取 package.json 中的版本号,然后打印出来
lightCyan(green()) 作用是让字体变成浅蓝色与绿色混合,变得比较醒目一点
现在重新编译执行
pnpm build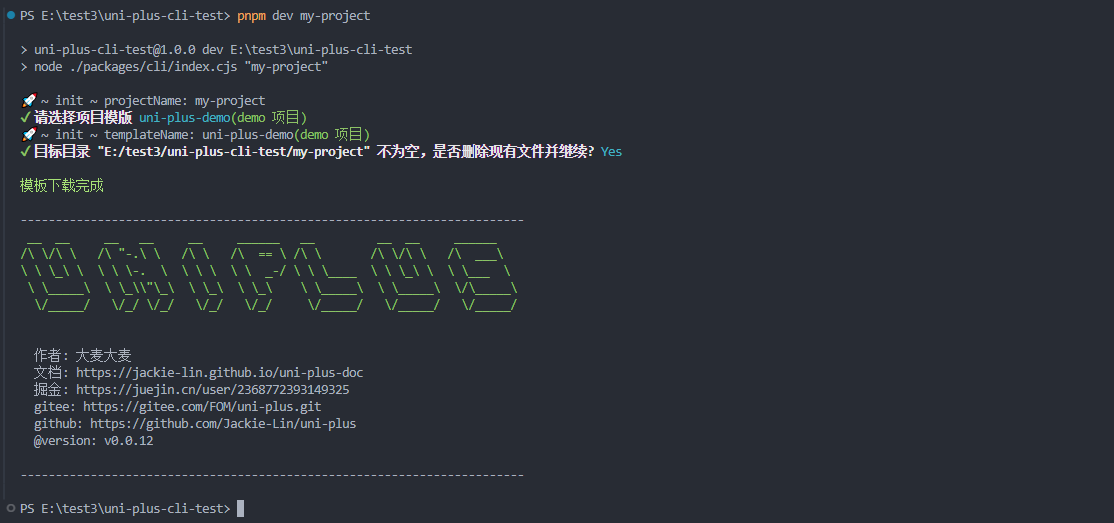
6. 打印 完成提示
我们都下载完成了,得加一个默认的让用户去安装依赖的提示

这个很简单,我们就直接写了
// src/utils/printFinish.ts

/* eslint-disable no-console */
import { bold, green } from 'kolorist'

/* 打印完成提示 */
export const printFinish = (projectName: string) => {
  console.log(
    `  ${bold(green(`cd ${projectName}`))}`
  )
  console.log(`  ${bold(green('pnpm install'))}`)
  console.log(`  ${bold(green('pnpm dev:h5'))}`)
  console.log();
}// src/utils/index.ts
export * from './cloneRepo'
export * from './printFinish'
export * from './clearFile'
export * from './selectTemplate'
export * from './getCommand'
export * from './printBanner'// src/index.ts
import { clearFile, coloneRep, getCommand, printBanner, printFinish, selectTemplate } from './utils';
/* 初始化 */
const init = async () => {
// 1. 获取文件名称,可以通过命令行获取,命令行没有就手动输入,不输入就使用默认名称
const projectName = await getCommand()
// 2. 选择模板名称
const templateName = await selectTemplate();
// 3. 同名文件夹不为空,是否覆盖
await clearFile(projectName)
// 4.下载模板
await coloneRep(projectName, templateName)
// 5. 打印 uni-plus Banner
await printBanner(projectName)
// 6. 打印完成提示
await printFinish(projectName)
}
init()执行一下
pnpm build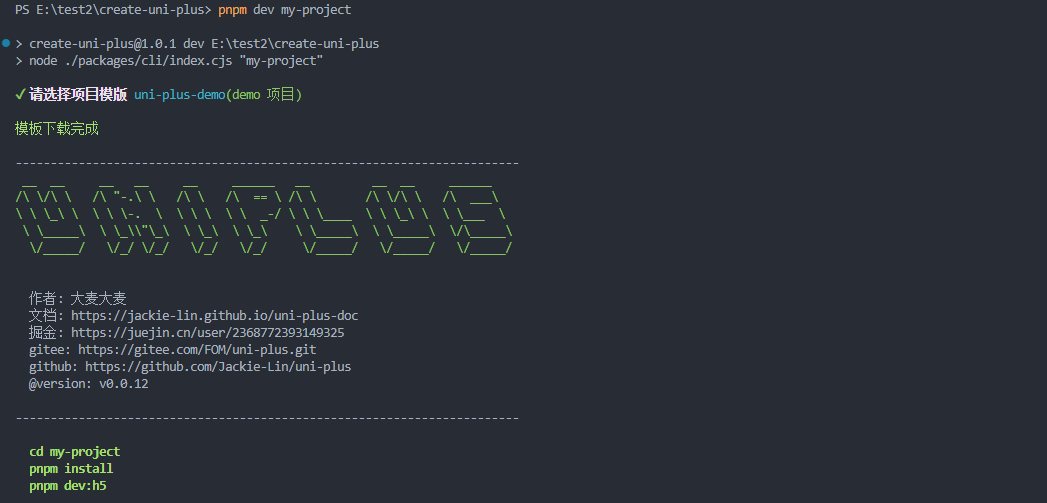
7. cli 脚手架发布
首先,要明确一点,我们的脚手架发布到 npm 上只需要打包好的文件
也即是 packages/cli/index.cjs
那只有单一的 .cjs 文件是无法直接启动的,需要有一个 package.json 进行配置
cd .\packages\cli\
npm init -y{
"name": "create-uni-plus",
"version": "0.0.1",
"main": "index.js",
"packageManager": "pnpm@9.15.2",
"type": "module",
"publishConfig": {
"access": "public"
},
"author": "大麦大麦 <1351123861@qq.com>",
"license": "MIT",
"description": "An easy way to quickly build the uniapp project",
"bin": {
"create-uni-plus": "index.cjs"
},
"files": [
"index.cjs"
],
"scripts": {
"dev": "node index.cjs"
},
"homepage": "https://github.com/Jackie-Lin/create-uni-plus",
"repository": {
"type": "git",
"url": "git+https://github.com/Jackie-Lin/create-uni-plus.git"
},
"bugs": "https://github.com/Jackie-Lin/create-uni-plus/issues",
"keywords": []
}name 是设置为create-uni-plus ,这个名称已经被我注册了,你可以改一下你自己的名称再上传,不然会报错
还有就是,名字要以 create- 开头
pnpm create uni-pluspnpm create 会默认把后面的 uni-plus 拼接成 create-uni-plus 并运行
publishConfig 设置 npm 包为公共包,私有包要钱
type 要设置为 module
bin 这个是设置执行命令,也就是说执行 create-uni-plus 这个命令就会运行 index.cjs 这个文件
bin 还需要和 #!/usr/bin/env node 配合,才能让编译器知道,index.cjs 需要使用 node 环境去执行
所以,需要在 src/index.ts 的最顶部中加入 #!/usr/bin/env node
#!/usr/bin/env node
import { clearFile, coloneRep, getCommand, printBanner, printFinish, selectTemplate } from './utils';
/* 初始化 */
const init = async () => {
// 1. 获取文件名称,可以通过命令行获取,命令行没有就手动输入,不输入就使用默认名称
const projectName = await getCommand()
// 2. 选择模板名称
const templateName = await selectTemplate();
// 3. 同名文件夹不为空,是否覆盖
await clearFile(projectName)
// 4.下载模板
await coloneRep(projectName, templateName)
// 5. 打印 uni-plus Banner
await printBanner(projectName)
// 6. 打印完成提示
await printFinish(projectName)
}
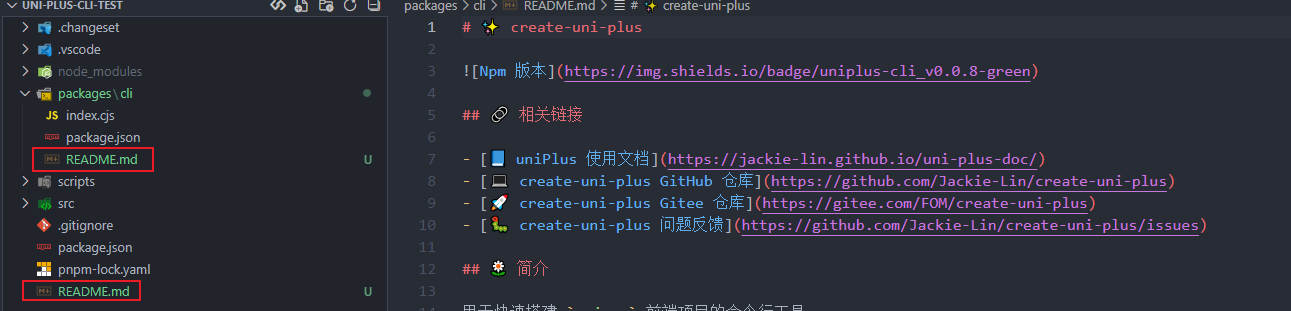
init()还需要在 packages/cli 与 项目根目录 各写一个 README.md 作为我们这个脚手架的使用手册
你可以参考我写的,也可以使用自己编写一个
# ✨ create-uni-plus

## 🔗 相关链接
- [📘 uniPlus 使用文档](https://jackie-lin.github.io/uni-plus-doc/)
- [💻 create-uni-plus GitHub 仓库](https://github.com/Jackie-Lin/create-uni-plus)
- [🚀 create-uni-plus Gitee 仓库](https://gitee.com/FOM/create-uni-plus)
- [🐛 create-uni-plus 问题反馈](https://github.com/Jackie-Lin/create-uni-plus/issues)
## 🌼 简介
用于快速搭建 `uniapp` 前端项目的命令行工具
## 📋️ 模版
- 快速生成 `Vue3 + TS + Vite + Pinia + ESLint + Prettier + Lint-staged + commitLint` 的模板
## 📦 选择类型
### `uni-plus-base`(base 项目)
所有的衍生项目都基于 `base` 项目,推荐使用 `base` 项目,因为 `base` 项目没有太多功能,只是基础配置。
如果你需要的功能很多,推荐你直接去修改 `demo` 项目
### `uni-plus-demo`(demo 项目)
这个项目包括了
- `echarts` 图表案例
- `pinia` 状态管理案例
- 权限控制案例
- `Layout` 布局案例
- 请求使用案例(包括分页、下拉更新、上拉加载更多)
- ...
## 🛠️ 使用
```bash
# 直接创建项目,项目名为 my-project
pnpm create uni-plus my-project
# 查看帮助
pnpm create uni-plus --help
# 设置文件名
pnpm create uni-plus my-project --name my-project
```
都搞定之后呢,得把仓库上传到 远程仓库,因为一些原因哈~
github 太慢了,所以我们使用 gitee 进行上传代码
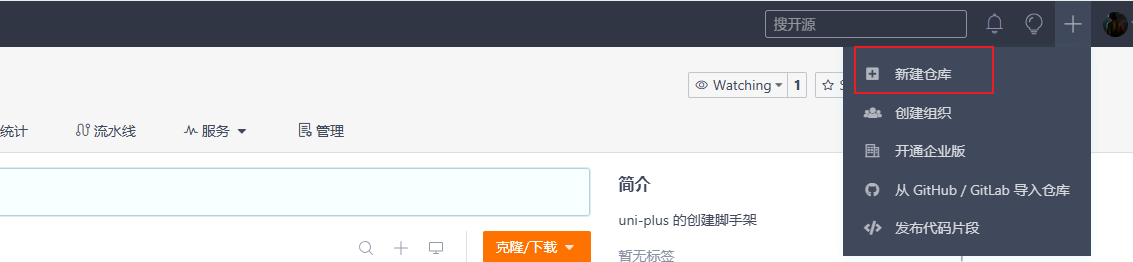
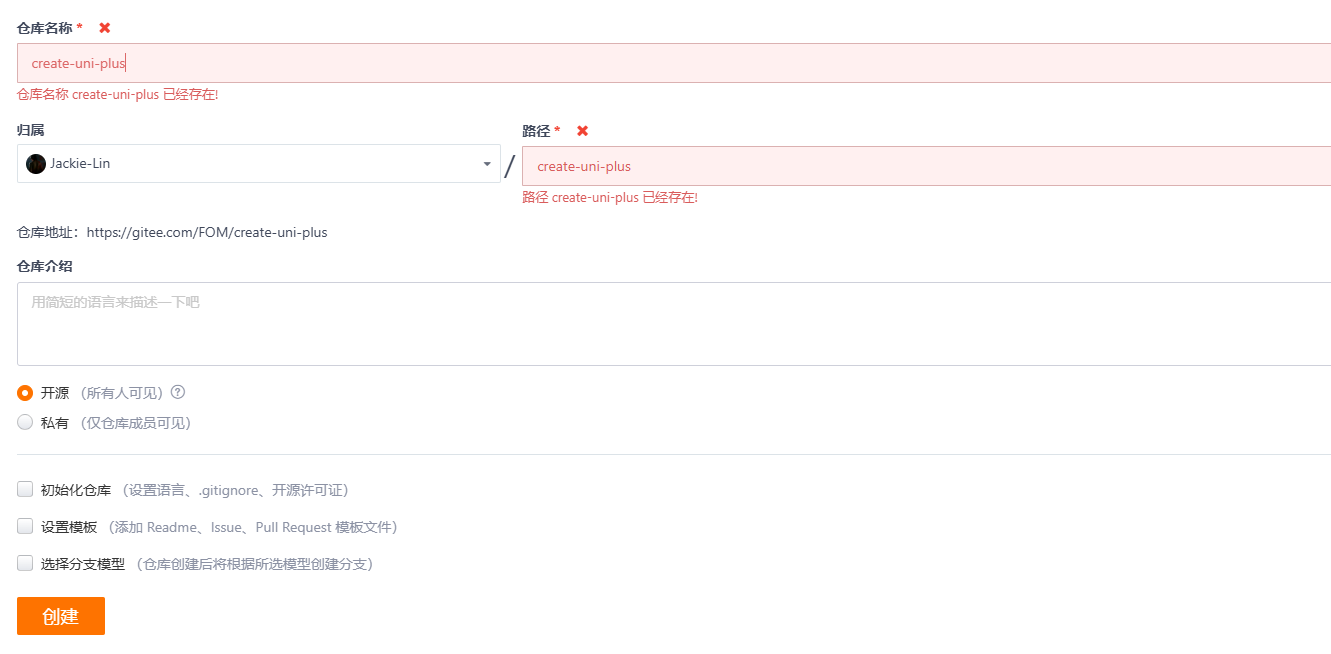
因为我已经创建过了,所以有提示,同学们可以自定义项目名进行创建
然后到我们项目中
git init
然后执行,你们仓库中的这句命令
先登录 npm,方便我们后续上传
npm adduser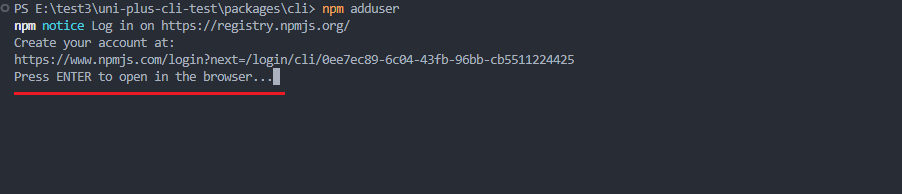
按 Enter 键,就会跳到浏览器进行授权,授权后就登录成功了
【注意】如果你出现,下面类似的错误,就是你的npm源,是代理源所以导致无法登录

使用 nrm 切换源即可
没有 nrm 可以使用 npm install nrm 安装下
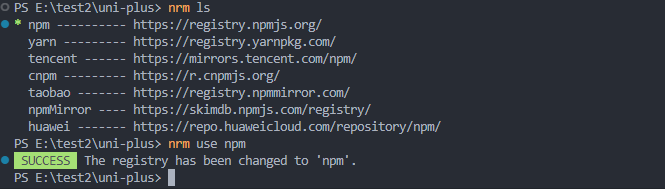
如果,切换后还是不行,那就退出编译器重新打开
现在安装下,npm 包版本控制依赖
pnpm add @changesets/cli prettier-plugin-organize-imports prettier-plugin-packagejson -D
pnpm changeset init
安装完成之后,项目根目录就会多一个 .changeset 目录
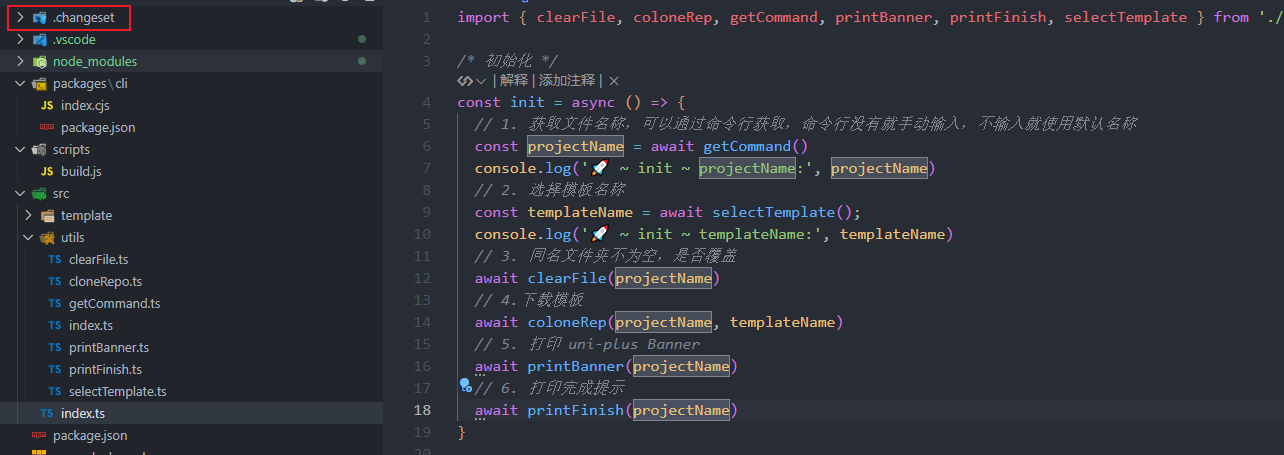
在项目根目录创建一个 pnpm-workspace.yaml,让 changeset 知道我们是要上传那一部分到 npm 上
packages:
  - 'packages/*'
项目根目录创建 .gitignore
node_modules/然后上传
git add .
git commit -m '初始化项目,创建 create-uni-plus'
git push -u origin "master"
changeset 上传打包好的脚手架到 npm
pnpm changeset add
patch 小版本 0.0.1 -> 0.0.2
minor 中版本 0.0.1 -> 0.1.0
major 大版本 0.0.1 -> 1.0.0
我们通过上下键,选择大版本 major,按 Enter 键确认

依次输入 Summary,然后一直回车即可,完成之后,在 .changeset 中就会多出一个 wet-roses-kneel.md 来记录当前变更信息

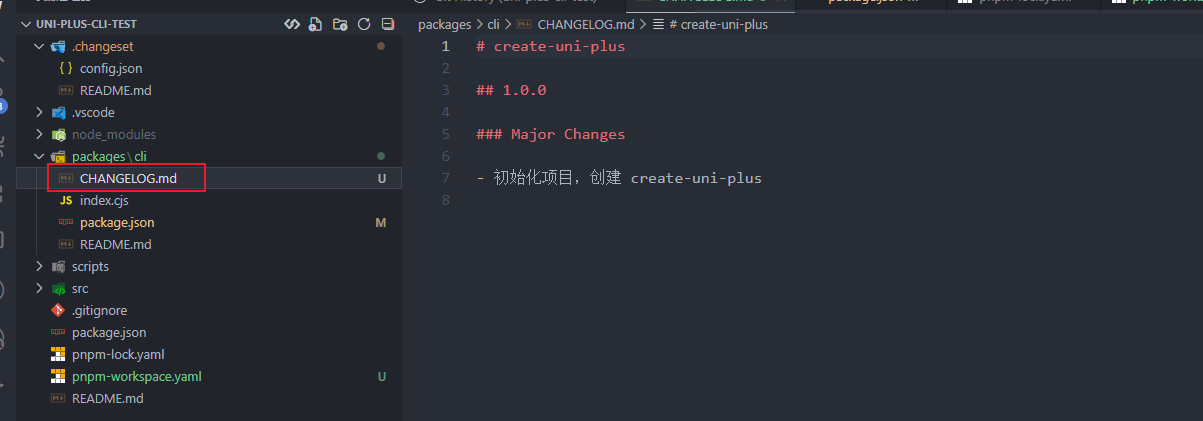
然后执行 version 命令来生成最终的 CHANGELOG.md 还有更新版本信息
pnpm changeset version
上传到 gitee 远程仓库,并将 cli 上传到 npm
git add .
git commit -m 'create-uni-plus 1.0.0'
git push -u origin "master"

pnpm changeset publish
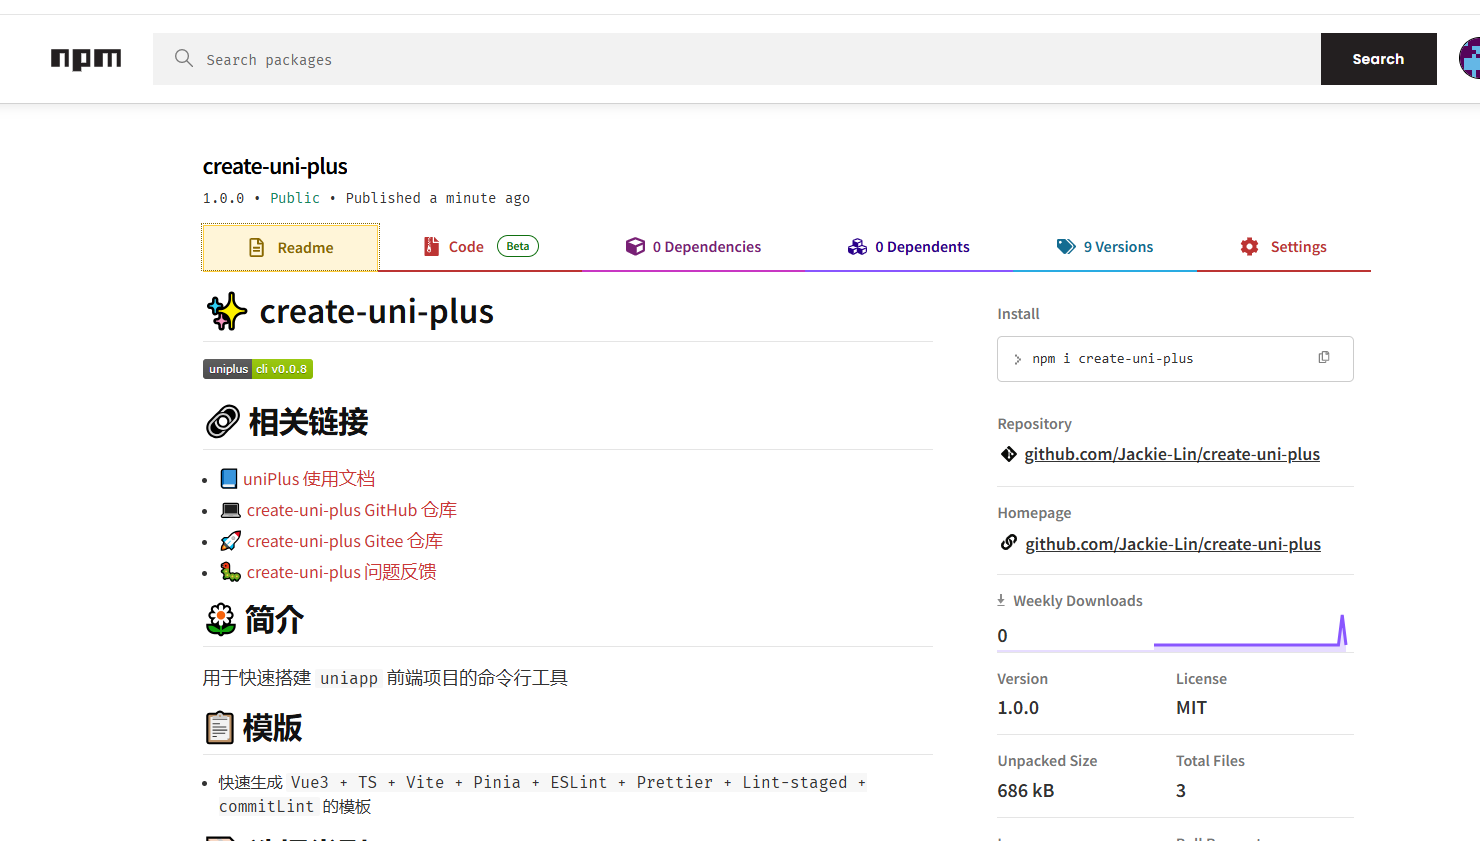
我们来到 npm 官网,可以看到 create-uni-plus 脚手架已经完美创建完成啦~
需要源码对照学习的同学,可以看下面的链接
总结
这一篇我们搭建了一个,用于创建 uni-plus 模板项目的脚手架
用 pnpm workspace + changeset + esbuild 方案
从脚手架的架构设计,到具体的功能实现,以及到最后的打包发布
基本上跑通了,一个脚手架开发的一整个流程
后续,有时间的话,还会讲解下 npm 包开发~